Monday 27 May 2013

Probiotics - Making your own probiotic rich foods

Probiotics are the good bacteria that colonise the digestive system. They play a variety of roles both in our digestive health and our overall wellbeing. Probiotics

-          Prevent the overgrowth of pathogens, or bad bacteria – there is only so much room in there. The more good bacteria, the less bad bacteria can fit in!

-          Helps to promote proper breakdown of food

-          Can reduce symptoms of diarrhoea

-          Lowered cholesterol – there is some evidence to suggest that probiotics can break down bile (digestive salts) in the intestines, preventing it from being reabsorbed

-          Improved immunity – your gut provides a line of defence against infection. Good levels of probiotics prevents overgrowth of pathogens, and there is some evidence to suggest they can increase the levels of our immune cells

-          Beneficial in the treatment or bowel conditions such as crohns, IBS and colitis.

-          Certain strains are useful in reducing skin conditions such as eczema

-          Probiotics are able to manufacture some vitamins including vitamin K, B12 and biotin.

-          Can reduce allergic response, not just to food intolerances, but to environmental allergens also

-          Beneficial to women who suffer thrush, candida and cystitis by recolonising the urogenital area and maintaining the right pH. This prevents the overgrowth of those pesky bad bacteria in these areas and reduces susceptibility to infection.

This is really only the tip of the iceberg with ongoing research being done into this area. As a rule of thumb, I would make it a priority to make sure your gut health is up to scratch and probiotics are certainly one of the most important aspects of this.

How do you increase your good gut bacteria?

I’m sure you’ve seen the hundreds of probiotic supplements in the chemist or health food store. These can be beneficial, particularly during times when high doses are required, such as following antibiotics or when suffering from thrush. However for most of us, eating probiotic foods is a great way to increase your levels of these bacteria. The benefit with eating probiotic rich foods is that they often contain a much larger number of strains of bacteria, there are thousands of types of probiotic bacteria, and most supplements only contain a few strains. Food sources often also contain the fibres and sugars required to nourish both your gut bacteria, and you.

Yoghurt, Kefir and cultured foods

You’ve heard of yoghurt, I’m sure, and you know to look for the ones that have probiotics in them. Kefir is a fermented dairy drink that contains billions of live probiotics, prebiotics and beneficial yeasts. Most people who are intolerant to the lactose in dairy and drink kefir as the lactose has been broken down by the bacteria, however follow your own gut on this. Cultured vegetables are vegetables that have been fermented to also contain high levels of beneficial bacteria and prebiotics and again are a great way to boost your levels. Fermented foods include sauerkraut and the Korean kimchi, but most vegetables and a variety of other products can be fermented.
You can buy these foods premade at your local health food store or make your own. You don’t have to eat much, just a small amount daily will do it.

Interested in making your own probiotic foods?

Making your own pre and probiotic foods is a great way to increase your levels of these beneficial bacteria and improve your gut health. Depending on your circumstances, you may find it to be cheaper, and certainly if you’re someone who has multiple allergies or intolerances, you’ll find it easier to make your own foods as you always know what’s in them.
The making of yoghurt, kefir and cultured vegies is quite specific so I have included a bunch of links for you. In the links below you’ll find all the information you need to make these foods successfully, and with maximum bacterial punch! I have included a variety of options, such as dairy and non-dairy options, paleo options and vegan option. There should be something for everyone in there.

Happy making.

Making your own yoghurt

Make Your own Yoghurt (dairy) http://www.makeyourownyogurt.com/make-yogurt/what-you-need
Down to Earth (dairy) http://down---to---earth.blogspot.com.au/2011/09/yoghurt-make-it-yourself.html
Cultures for health – (coconut milk) http://www.culturesforhealth.com/make-coconut-milk-yogurt-recipe

Kefir
GAPS Australia – comprehensive website about all kinds of kefir http://gapsaustralia.com.au/kefir-2/

 Cultured foods
The Body Ecology Diet - http://bodyecology.com/#

Wednesday 22 May 2013

Weird and Wonderful Kohl Rabi

Kohl Rabi is a tuberous vegetable that is part of the brassica family (along with broccoli, cauliflower and kale). It has a slightly sweet flavour. It looks and sounds a little odd, so why would you add to this food?

Kohl Rabi is a nutritional power house. It contains only 27 calories per 100grams. In this 100grams only 6 grams of carbohydrates and 4 grams of fibre. This makes it a very low GI vegetable that’s great for both regulating blood sugar levels and overall digestive health.

Kohl Rabi is also nutrient dense, particularly with regards to minerals, being a great source of calcium, magnesium, iron, potassium and phosphorus, making it particularly bone friendly. It also contains selenium, and B vitamins. It is also a good source of vitamin C, with around 62mg per 100g. The leaves or tops of root are a great source or carotene and vitamin A,
sciencedaily.com
A great benefit of eating Kohl Rabi are the phytochemicals that are present in vegies from the brassica family, isothiocyanates, sulforaphane, and indole-3-carbinol. Research suggests these phytochemicals can help reduce the effect of carcinogens on our cells.
The high level of nutrients such as carotenes, vitamin A and vitamin C in cruciferous vegetables provide a great antioxidant profile, and have been shown to be beneficial in heart disease and stroke, not to mention eye health and skin.
When buying Kohl Rabi, purchase ones that are less than 8cm width, any large than this and they could be ‘woody’, also choose ones that are firm with smooth, unwrinkled skin. Keep it in a cool dark place, leaving it in the fridge could lead it to go bad more quickly. If stored correctly it should last a week or two at home.
To cook it, take the top off, chop it up and boil it for up to 10 minutes. Or just throw it into soups and stews. It’s pretty sturdy and versatile.
So, now you know why you want to eat it, and how to choose and keep it, but still not sure what to do with Kohl Rabi? Here are 2 recipes.
 
Greek Style Kohl Rabi

 Ingredients

Serves 4 as a starter or snack
 •2 small/medium Kohlrabi
 •2 pears
 •100 g of Feta cheese
•100g salad leaves
 •50g dates
 •1 tablespoon honey
 •2 tablespoons balsamic vinegar
 •2 tablespoons olive oil

Directions

1. Peel the kohlrabi and chop into dice, about 1cm big.
2. Put the kohlrabi on a baking tray and drizzle with the olive oil.
3. Bake at 180 C for 20 minutes, or until softened.
4. Slice the pears in half and cut away the cores. Cut the pears into slices.
5. Put the salad on a large serving plate and arrange the pear slices and kohl rabi on top.
6. Crumble the Feta on top of this.
7. Make the dressing: Chop the dates and mix with the balsamic vinegar and honey.
8. Drizzle over the salad.

Kohl Rabi curry

Ingredients:

Kohlrabi - 3, diced along with the greens
Onion - 1 medium, diced
Garlic - 1 clove, minced
Tomatoes - 2 medium, chopped
Green chilies - 2, chopped
Tamarind paste - 1 tbsp.
Jaggery - 1 tsp. (or to taste)
Red Chili powder - 1 tsp.
Mustard seeds - 1/2 tsp.
Cumin seeds - 1/2 tsp.
Salt - to taste

Directions

1.      Microwave chopped kohlrabi for 5 minutes or until tender. (Pressure cooking works fine too)

2.      Heat 1 tbsp. oil in a pan, add the seeds and after they pop, sautĂ© onions till translucent.

3.      Add tomatoes and green chilies; cover and cook till tender.

4.      Add boiled kohlrabi along with the greens, red chili powder, tamarind paste, jaggery, salt and 1/2 cup of water. Cover and simmer for about 10 minutes or till the gravy thickens.

Enjoy J


Monday 20 May 2013

5 Marvelous Benefits of Magnesium

Magnesium is a mineral that plays a role in over 300 different reactions in our body. What are some of the main benefits of magnesium?
gendenk.org
Benefits of magnesium

1.       Reduces blood pressure – the walls of your blood vessels contain muscle tissue that helps them to dilate (stretch open) and contract as blood flows through. This allows your blood vessels to regulate the pressure inside them. Magnesium plays a role in the dilation, or widening of the blood vessels, which reduces the internal pressure. If you guessed that that means magnesium can lower your blood pressure, you guess right.

2.       Muscle relaxant – ever suffered from muscle cramping during the night? Magnesium is a muscle relaxant and cramping is often a sign of low magnesium levels. Ladies, think period pain.

3.       Regulation of blood sugar – magnesium is involved in the regulation of blood sugar levels via its involvement with the secretion of insulin. Many people with type 2 diabetes are shown to have low levels of magnesium. Some research suggests increasing your daily intake of magnesium by 100mg reduces the risk of developing type 2 diabetes by up to 15%, although it should be noted that this could be partly attributed to the fact that foods high in magnesium tend to be whole, nutrient dense foods that are high in fibre and low in sugar. Either way, the end result is great.

4.       Bone health – 60% of the magnesium in the body is found in your bones. Research demonstrates that magnesium is necessary for calcium absorption making it important for bone health and also tooth mineralisation. Healthy bones require a multi-nutrient approach of which magnesium plays a vital role.

5.       Insomnia, depression, and migraine – magnesium plays a role in the production of melatonin, a hormone necessary for sleep, and serotonin, your happy hormone. It also participates in the regulation of stress hormones. As such, magnesium is important for those suffering insomnia, depression or anxiety. This combination of nervous system relaxation, blood vessel relaxation and muscular relaxation can also be useful in treating headaches and migraines. In fact, many people who suffer migraines have low levels of magnesium.

Where do you get magnesium?
  • Whole grains contain good amounts of magnesium. Note however that once you process a grain you lose most of its magnesium content as it’s often found in the bran (outer husk) and germ (inner part) of a grain which are removed during processing. This means that things like flour (bread, pasta) are not good magnesium sources however whole grains are.
  •  Nuts such as almonds, cashews and peanuts contain good amounts of magnesium, as do pumpkin, flax and sesame seeds
  • Dark green leafy vegetables are a great source of magnesium, it is bound to chlorophyll, the green pigment in plants.
  • Cacao is a good source of magnesium. It is used to make dark chocolate or you can buy the powder and use it as you see fit.
  • Herbs and spices are an easy way to add a touch of magnesium to any dish, Try adding coriander, dill, sage or basil to a meal.
You may note that many of the magnesium rich foods are whole foods, I don’t want to harp on it, but there’s a message there. J

Chris

Friday 17 May 2013

3 delicious black bean recipes


gourmetgoldmine.com
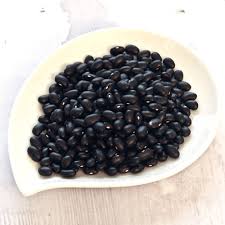
Beans are a nutritious addition to any diet. They are low GI, high in fibre and contribute to your daily protein intake.

You may be familiar with the more commonly eaten kidney beans, cannellini beans or chickpeas, but what about black beans?

Black beans contain on average 24grams carbohydrate per 100gram serve, with 9 grams fibre and around 9 grams protein. This makes them a great contributor of protein to a vegetarian diet.

Nutritionally, Black beans are high in vitamin B1, magnesium, phosphorus and manganese, they also have a decent amount of folate (B9). However they contain most of the B vitamins, albeit in smaller amounts, including B2, B3, B5 and B6. They also contain calcium, copper, zinc and selenium. The black colour of the skin is provided by anthocyanins which are both antioxidants and anti-inflammatory.

Why include black beans in your diet?

Black beans are great for digestive health. The fibre in black beans assists the movement of stool through the digestive tract. Recent research has also shown that black beans help support healthy functioning of the lower colon and may be beneficial in reducing the risk of illnesses such as colon cancer.

Black beans are also high in many heart healthy nutrients making them great for overall cardiovascular health. Soluble fibre in black beans for example helps to reduce cholesterol reabsorption in the intestine. Black beans provide a good amount of magnesium, a mineral beneficial for blood pressure regulation, and folate, which is known to reduce homocystiene levels. Homocystiene is used as a general indicator of heart health.

When it comes to weight loss and blood sugar regulation, beans are a great food to include. Their combination of protein and fibre provides a slow burning, low GI fuel and reduces the GI of foods eaten around the same time. This combination also makes beans a low calorie yet filling food. A nice inclusion to those wanting to lose weight.

The colour of black beans also provides a substantial health benefit. The phytonutrients and anthocyanins in black beans provide antioxidant and anti-inflammatory protection to the body’s cells. If you’ve read my rainbow diet series, you’ll know that including foods of each colour daily provides an array of nutrients and antioxidants that are individual to that particular colour. Black beans are a delicious way to up the black component of your diet.

Struggling to get enough black in your diet? Here are 3 delicious black bean recipes to help you out

Spicy, Citrusy black beans


Spicy, Citrusy Black Beans (photo)

Ingredients


  • 4 cups dried black beans
  • 2 1/2 quarts (10 cups) water
  • 2-3 fresh sprigs oregano, or 1 Tbsp. dried
  • 3 bay leaves
  • 6 small or 3 large sage leaves
  • 2 teaspoons salt
  • 4 Tbsp. olive oil
  • 2 yellow onions, chopped
  • 2 chopped peppers – bell pepper, Anaheim, or jalapeño (your choice, depending on taste for heat), seeds, stems and ribs discarded
  • 6 cloves crushed garlic
  • 2 Tbsp. Ancho red chili sauce, or chili powder or Tabasco to taste*
  • 1-2 teaspoons of purĂ©ed chipotle in adobo, chipotle Tabasco, or chipotle powder (to taste)
  • 1 Tbsp. cumin, (crushed whole toasted cumin seed is best, if possible)
  • 3 Tbsp. frozen orange juice concentrate or 1/2 cup fresh orange juice
  • Juice of 1 lime
  • 2 Tbsp. rice wine vinegar
  • Chopped fresh cilantro for garnish

Instructions

1 Prepare the beans. Rinse and sort the beans, discarding any stones or shrivelled beans. You can soak the beans overnight in cold water (cover with several inches of water) OR pour enough boiling water over them to cover by a few inches and soak them for an hour OR skip the pre-soaking step. Soaking will speed up the cooking process. If you soak, discard the soaking liquid after soaking.
2 Add beans to a large pot with 2 1/2 quarts (10 cups) of water. Add oregano, bay leaves, and sage. Bring the beans to a boil and reduce heat to a simmer. Cook until the beans are soft, but not quite done. The time will vary depending on how large, dry, or old your beans are, and if you have pre-soaked them, from anywhere from 30 minutes to an hour and a half.
3 While the beans are cooking, sauté onions and peppers in olive oil until soft. Add chili sauce, chili powder, and/or chili purée, cumin, and garlic. Sauté until spices are fragrant.
4 Fish out and discard the bay leaves, stems of oregano, and sage leaves from the pot of beans. Remove, but reserve, extra cooking liquid until there is about 1/2-inch of liquid above beans.
5 Add the onion mixture and salt to the pot of beans. Cook another hour or so until thickened. Add reserved liquid if needed.
6 Add half of the orange juice, and simmer. Adjust chili heat at this point – you may or may not want to add more of your chili paste. Just before serving, add remaining orange juice, lime juice, and vinegar. Salt to taste. Garnish with chopped fresh cilantro.
Serve with corn tortillas, and/or rice, sour cream, and salsa. Serves 8

Fiesta Bean Salad


Ingredients


2 cloves garlic, minced
3 tbsp. fresh lime juice
1 tbsp. extra virgin olive
1 tsp. cumin
Pinch crushed red pepper flakes
1/2 teaspoon salt
15 oz. can black beans, rinsed and drained
1 cup canned chickpeas, rinsed and drained
1 cup cherry tomatoes, halved
1/4 cup minced red onion, finely diced
1/4 cup cilantro, chopped
1 medium avocado, diced

Directions


1.       In a large bowl, combine the garlic, lime juice, oil, cumin, crushed red pepper, and salt

2.       Add the black beans, chickpeas, tomato, onion and cilantro; mix well. When ready to eat, gently mix in avocado and serve right away

Black Bean Soup

From Food.com – http://www.food.com/recipe/black-bean-soup-152334
Black Bean Soup. Photo by PanNan

Ingredients


2 (16 ounce) cans black beans, undrained, divided
1 cup reduced-sodium chicken broth
 Non-stick cooking spray
1 small onion, chopped
1 teaspoon bottled minced garlic
1 (16 ounce) jar chunky salsa
4 teaspoons lime juice
2 teaspoons ground cumin
1/4 teaspoon crushed red pepper flakes (optional)
1/3 cup plain yogurt (optional)
Fresh cilantro leaves

Instructions


1 PLACE 1 can of beans with liquid and broth in blender or food processor; cover. Blend until smooth. Coat large saucepan with cooking spray. Heat over medium-high heat. Add onion and garlic; cook for 4 to 5 minutes or until onion is tender.

 2 ADD blended bean mixture, remaining beans and liquid, salsa, lime juice, cumin and crushed red pepper. Bring to a boil. Reduce heat to low; cover. Cook, stirring occasionally, for 25 to 30 minutes. Serve topped with yogurt. Garnish with cilantro


Wednesday 15 May 2013

Healthy bones – preventing or minimising issues with bone health

How often do you think about the health of your bones? Despite their vital function, our bones seem to be a little undervalued, particularly in our younger years. The fact is however that we’d be in a whole lot of trouble without them. Unfortunately we don’t often see the effects of our diet and lifestyle choices on our bone health until we’re older and discover we have osteoporosis or another disease of the bone. By that point it’s too late to rectify the situation and all we can hope for is to reduce further damage.

The good news is that our bones are an ever changing structure. There is a constant movement of minerals in and out of our bones, and a constant building and breakdown of bone tissue. This is a natural occurrence and happens in response to the daily supply of nutrients we provide and the demands we place on our bodies. Whether you’re 25 or 60, you can use these basic principles of diet and lifestyle to improve the structure and function of your bones so they’ll best serve you, and keep you upright!
functiontofitness.com

Diet


Diet is a leading factor in having strong and healthy bones. Your bones are a storage place for a variety of minerals including calcium and phosphorus. These minerals are also found in the blood stream and are used for a variety of functions in the body. When levels of these minerals in the blood stream drop to below ideal concentration the body takes the minerals from the bones to top up blood levels. Ideally, we should ensure that our diet provides our bodies with enough minerals daily so that we don’t need to break down too much bone tissue to fill the demand. Makes sense right? Less breakdown means the bones are stronger and thicker, more breakdown means they’re weakened. Where do we get our minerals for bone health?

Dairy


Dairy was once touted as the best way, if not the only way, to get your calcium and bone loving nutrients. These days however there are a variety of reasons people steer clear of dairy, whether it be due to intolerances, ethical reasons such as veganism or the dislike or processed food (which most of our dairy is). The good news for you is that dairy is not your only option for calcium. If you’re.

1.       For the dairy eater

a.       low fat dairy has slightly more calcium than full fat products

b.      try swisse cheese, ricotta, mozzarella and cheddar for some of the higher calcium concentrations

c.       Consider finding raw unprocessed milk if it’s available in your country (it’s not allowed here in Australia). Given its not treated with heat many of its vitamins like vitamin A and D (both of which are important for bone health) are still present

2.       for the non-dairy eater

a.       If you’re using milk replacements like nut or soy milks check to see that they are fortified with calcium (you’ll see this on the ingredient list and also in the nutritional panel)

Plant foods


Many vegies, particularly dark green leafy vegies provide good sources of dietary calcium, not to mention other nutrients for bone health including manganese, magnesium, potassium, vitamin K, vitamin A and carotenoids.  


1.       Vegies

a.       Dark green leafy vegies – vegetables like spinach and kale and salad leaves like collard greens contain good amounts of calcium.

b.      1 cup of cooked spinach for example contains around 245mg calcium Broccoli is a good calcium source at around 60mg per cooked cup

c.       Most vegetables have small amounts of calcium present so mix it up and work towards a minimum of 3 serves of vegetables a day

d.      Vegies are a great source of nutrients like manganese and copper which are important for bone health. They also contain high amounts of carotenoids, vitamin A and importantly Vitamin K which involved in regulating calcium deposit

2.       Fruit

a.       Fruit like figs, rhubarb, dates and dried apricots contain good amounts of calcium

b.      Fruit is also a great source of potassium and other minerals great for bone health

c.       Quite often fruit juice is fortified with extra calcium

3.       Tips

a.       Lightly cook or steam your dark green leafies to help break down factors that prevent nutrient absorption

b.      Eat a variety of foods, variety is the key to any healthy diet

Nuts and seeds


Nuts and seeds are great sources of minerals

1.       Sesame seeds are a great source of calcium. A quarter of a cup contains around 350mg. You can eat them by the handful, use them as a crust on fish and throw them over salads

2.       Almonds – a small fist full of nuts contains around 75mg of calcium, not to mention magnesium

3.       Include a variety of nuts for their vast mineral content and health benefits

Fish


1.       Eating canned fish such as tuna and salmon with their bones is a good way to get additional calcium

2.       Fatty fish such as mackerel and salmon are food sources of vitamin D

Alkaline diet


Eating a diet high in vegetables and low in acid producing factors such as sugar and alcohol helps keep the bones healthy. How? Minerals often act as buffers, stabilising the pH. If your body is too acidic, minerals will be pulled from the bone or taken from the bloodstream to buffer and reduce the acidity back to your body’s acceptable levels. Eating a nutritious, more alkaline diet means less bone loving minerals being used for other purposes.

Lifestyle factors


Exercise


Exercise is huge for bone health. Your bones are constantly remodelling and rebuilding themselves based on the stress or load you place on them. If you try to lift an item and it puts pressure on your arm bones, your arm bones will over time become stronger in order to support the heavier load. Therefore one of the best ways to improve bone health and strength is to exercise and stress those bones! The best exercises for bone health are those with weight bearing such as

-          jumping rope (weight on the lower body)

-          impact aerobics

-          weight training (full body workout)

-          running/jogging (weight through lower body and spine)

Not into these? Any exercise that has some sort of resistance or weight component will do. Just get moving. Osteoporosis Australia has some great tips on exercise for bone health.

Get enough sunlight


Sunlight allows your body to produce vitamin D and really, you need vitamin D, not just for bone health but for general health and wellbeing. I’ve written an article on vitamin D if you’d like to know more about this fabulous vitamin.

Avoid smoking


The chemicals in smoking reduce your mineral absorption and draw minerals from the bone. Enough said really.

Avoid excess alcohol


Excessive alcohol intake is inflammatory and can cause mineral loss from bone and malabsorption of minerals.
 

Reduce Caffeine and soft drink intake


Both of these affect mineral absorption. Soft drinks are high in phosphorus which needs to be balanced with calcium for proper bone health. Excess soft drink intake can throw this balance out and reduce calcium absorption and bone health.
So there you have it, some diet and lifestyle tips to keep your bones strong and healthy into the future. It isnt complicated but the earlier you start, the better, so eat up.

Chris

Sunday 12 May 2013

4 ways to improve your nutrient absorption today

Steaming your green leafies increases mineral absorption

consciouslifenews.com
Dark green vegies like spinach, chard and beet leaves contain anti nutritional factors like oxalates. These oxalates are called anti nutritional factors because they reduce the absorption of other nutrients. In the case of oxalates, they reduce calcium absorption. While you can’t eliminate oxalates from your greens all together, you can reduce them by up to 15% by lightly cooking the greens. Note that I said lightly, overcooking them just lowers their nutritional value across the board. Lightly cooking your greens will reduce your total intake of oxalates and assist in improving your mineral absorption.

Increase lycopene absorption by processing your tomatoes

feedthefamily.com.au
This is one of those times where you’ll hear me recommend something seemingly contradictory. Ill often suggest you don’t eat processed food, however in the case of tomatoes, the more processed the better. Lycopene is a carotenoid (similar to beta-carotene) found in tomatoes. It has been shown to be beneficial for heart and cardiovascular health, as a potent antioxidant and for sperm and prostate heath. Research has shown that lycopene is much better absorbed and utilised by the body after tomatoes have been processed and cooked. The presence of fat in the meal also aids in the absorption. So, what is one of the best sauces of lycopene? Tomato paste! It’s highly concentrated, processed, and is traditionally included in foods that contain some fat such as spaghetti bolognaise or pizza.

Reduce gas from beans by soaking them and using spices

Who avoids beans because of the er, digestive disturbance they cause? Beans contain some complex sugars and fibre that most of us struggle to digest. While some people will always struggle to digest beans without gas, many of us will find that we can reduce this lovely effect if we soak them for 6-8 hours before cooking them. You can also follow a multicultural approach. The Japanese will often add a piece of seaweed, such as kombu or wakame to their beans to reduce the gas effect, while in India they use spices such as ginger and asafoetida to make them more digestible.

Increase iron absorption from your vegies with vitamin C rich foods

We all know we get iron from meat, but it is possible to get a decent amount of iron from non-meat sources also. Iron from meat is called heme iron (because its part of haemoglobin in blood) and vegetarian sources are called non-heme iron (because they’re not bound in blood). Heme iron is more easily absorbed than non-heme iron, however you can increase the absorption of your vegetarian iron by making sure you have a vitamin C rich food present. How do you do this? Why include some capsicum (high in vitamin C) in your salad or bean dish?

Friday 10 May 2013

3 Gorgeous Gluten Free Bread Recipes

Bread. Depending on your own health situation and philosophy, you’ll either bounce right back off this page or devour it.

 Bread seems to be one of those topics that insights a passionate response from everyone. When working with weight loss clients, I often suggest that they eat less bread. Whoa. I would probably get a better response if I suggested they run away and join a cult. The look of horror on peoples face and the confused expression as they try to work out else they’re supposed to eat… it always surprises me.

Why? Because I hardly eat bread. I certainly grew up on it, in fact up until my mid-teens it was ALL I would eat. You’d never guess I was so headstrong and fussy my diet was predominantly nutella sandwiches, a huge thick layer of nutella between 2 slices of white bread, and if you zap it in the microwave, it goes all runny and goopy. There’s a special way you eat it so the nutella doesn’t drip out the side. Obviously building the basis of a strong nutritional knowledge… hazelnuts are good for you right? *clears throat*

These days however, bread is a treat. I have no physiological reason for not eating it often, it doesn’t make me feel sick, and I don’t have an intolerance. For the most part my diet has evolved without bread in it. I do however enjoy bread, love it even. Good bread, not the white kind of my childhood. A cafĂ© breakfast with a good thick crusty bread. Yum.

For many however, the fact they love bread is overshadowed by their inability to eat it. Intolerances and allergies to common bread ingredients such as wheat or gluten mean that it’s off limits.

From a health perspective, bread is a processed foods, and should really be enjoyed as a treat, rather than a component of a meal. Consider it a treat, something delicious to look forward to on a special occasion. If you’re trying to lose weight, it, along with other grain products like rice, would be the one of the first things I would reduce.

For all of us who enjoy a good bread, why not make your own? You’re guaranteed to know what’s in it, and don’t things always taste better when you make them yourself? Here are 3 gluten free bread recipes for you to try. Enjoy the things you love without the worry.

Gluten Free Bread – a simple recipe


Recipe from BBC Food

Gluten-free bread
Ingredients


Preparation method

  1. Heat the oven to 180C/350F/gas 4 and bake the linseeds on a tray for 10-12 minutes, or until they darken slightly (toasting will burst the husks slightly and allow the seeds to release a sticky gluten-like gum when wet, making the crumb softer and adding a wheat germ-like flavour).
  2. In a bowl, mix the water and yeast and then stir in the yoghurt and seeds. In a large mixing bowl toss together the corn flour, salt, sugar and psyllium husk powder. Pour in the yeast mixture and olive oil and mix well to make a smooth thin batter.
  3. Over the next five minutes this liquid will turn into a sticky dough, as the linseed, corn flour and psyllium husk powder together absorb liquid and become gel-like. Once the mixture is firm enough, knead it for 10 seconds on the worktop to mix everything again, then return the dough to the bowl, cover and leave for 30 minutes.
  4. Line a tray with non-stick baking paper. Shape the dough into a fat sausage, the length of the tray, then brush with extra olive oil, cover and leave to rise for 30 minutes.
  5. Heat the oven to 240C/465F/Gas 9, uncover the dough and slash the top with a small sharp knife, sprinkle with a little corn flour to give it a floured look and bake for about 40 minutes, or until rich golden-brown in colour. Leave to cool on a wire rack before slicing.

Gluten free Garlic Flat Bread – Using boxed Gluten free bread mix


Recipe from Taste.com.au
Gluten-free garlic flat bread
Ingredients

  • 7g sachet gluten-free dry yeast
  • 480g gluten-free bread mix
  • 1/3 cup olive oil
  • Gluten-free plain flour, for dusting
  • 4 garlic cloves, crushed

Directions

  1. Combine yeast and 1 1/4 cups warm water in a large bowl. Add bread mix and 1 tablespoon oil. Stir to form a soft dough. Turn onto a floured surface. Gently knead into a ball. Transfer to a large greased bowl. Cover. Set aside in a warm place for 30 minutes or until doubled in size.
  2. Punch dough down. Divide into 8 portions. Roll 1 portion out to a 20cm round. Repeat with remaining dough.
  3. Heat a greased barbecue plate or chargrill on medium-high heat. Add garlic to remaining oil. Brush 1 side of dough rounds with garlic mixture. Cook 2 rounds for 4 minutes. Turn. Brush with garlic mixture. Cook for 4 minutes or until browned and lightly puffed. Place on a plate. Cover to keep warm. Repeat with remaining dough rounds and garlic mixture. Serve.

Farmhouse Seed Bread


Recipe from The whole life nutrition kitchen


Notes from the recipe author

There are so many variations to this bread. I've made it into an Olive-Rosemary bread using 1 cup pitted kalamata olive sliced thin and 2 to 4 tablespoons chopped fresh rosemary. You could also try a Garlic-Seed bread by adding in chopped fresh garlic and seeds. I am sure there are many more variations. If you have a corn allergy, try replacing the cornmeal with almond meal. I have made this bread with many different flour combinations so feel free to experiment, but this one is my favourite for flavour and texture. The bread gets its crusty crust from being baked on a stone pan with a pan of water on the lower oven rack. The steam from the water helps to form the crust. The bread will be a little gummy hot out of the oven so be sure to let it cool a bit before cutting into it. Slice it and serve with a good quality olive oil for dipping. It is also delicious spread with either almond butter or hummus!

Wet Ingredients:

2 ½ cups warm water (105 to 110 degrees F)

2 ¼ teaspoons active dry yeast (1 package)

1 teaspoon maple syrup or organic cane sugar

2 tablespoons extra virgin olive oil

2 tablespoons maple syrup

1/3 cup ground chia seeds


 Dry Ingredients:

1 cup teff flour

1 cup sorghum flour

½ cup sweet rice flour

½ cup cornmeal

1 ½ teaspoons sea salt

Topping:

extra virgin olive oil

Poppy seeds

Sesame seeds

Directions

1.       Place the warm water in a bowl or 4-cup liquid glass measure. Add the yeast and teaspoon of maple syrup, whisk together. Let rest for 5 to 10 minutes to activate the yeast. The mixture should get foamy or bubbly. If not, dump it out and start over.

2.       While the yeast is activating, mix together the dry ingredients in a large bowl.

3.       After the yeast is activated whisk in the olive oil, maple syrup, ground chia seeds, and phylum husks into the water-yeast mixture. Let stand for 2 to 3 minutes (not any longer) to let the chia and psyllium release their gelatinous substances. Whisk again.

4.       Pour the wet ingredients into the dry and mix together with a large wooden spoon until thick. Then knead the dough on a floured wooden board to incorporate the flour. Add more teff and sorghum flours, a little at a time, until the dough holds together and isn’t too sticky (about ¼ to ½ cup total). Don’t add too much flour, otherwise the dough will become very dense; it should still be slightly sticky. Form dough into a ball, place back into the large bowl, and cover with a damp towel. Place in a warm spot to rise. I like to place the bowl over a pot of warm water. Let dough rise for an hour or until doubled in size. Rising time will depend on the temperature of the environment around the dough.

5.       Punch down the dough and turn out onto a lightly floured wooden board. Knead the dough for about a minute. Then form into a round ball. Place on a square of parchment paper and use a sharp knife to cut a shallow “tic-tac-toe” pattern on the top. Drizzle with olive oil and sprinkle with poppy seeds and sesame seeds. Let rise for about 30 minutes in a warm place while the oven and stone are preheating.

6.       Carefully lift the parchment paper with the risen loaf and place it onto the stone in the oven. Bake for about 40 minutes. Remove from oven and let cool 30 to 60 minutes before cutting into it. The bread will be very gummy hot out of the oven. The texture is perfect once cooled. It reminds me of a hearty whole wheat bread.

7.       Tip: Be sure to buy whole chia seeds and then grind them very finely in a coffee grinder or the dry container of your Vita-Mix. If using a Vita-Mix, it is best to grind at least one cup at a time so they grind properly. Store them in a glass jar in your fridge for no longer than a week.

8.       Note: If you are adding garlic or olives to this bread, add them in when you are kneading the dough the first time.